2019.02.09: 이 포스팅은 WP 4를 기준으로 만들어졌던 것으로 WP 5에서는 테스트되지 않았습니다.
Intro
한 5년 전쯤 zeroboard, gnuboard 등을 이용해서 병원내 DB를 만들었는데, 당시에 테이블구조를 바꾸고 별별 짓을 다했던 기억이난다.
사실 이런 일들이 매우 비효율적인데, 아무리 기존의 툴을 이용한다고 하더라도 로직이 완전히 새로 구성되어야 하기 떄문이다.
WordPress로 몇몇 소소한 프로젝트를 하다보니, 이거로 DB를 만드는 것이 가능하겠더라 싶어서, 하나하나 기록을 남기면서 진행해보고자 한다. 최종적으로 결과물이 나올지는 나도 잘 모르겠지만.
Plugins
일단 다음과 같은 Plugin들을 사용한다.
WPF; 150불 정도에 구입했다. Hooking 등의 고급 elements가 필요했다
CPT UI를 사용하는 이유는 page라고 하는 것을 하나의 ‘record’라고 본다면, 하나의 ‘patient’ 와 종속된 여러개의 ‘patient_record’ 구조를 만들어낼 수 있을 것 같다. 두 다른 레코드는 메타값으로 연결하면 되기 때문에.
또하나는 CPT UI에서 각 custom type에 대한 각각의 archieve-(type).php 로 스킨을 나눌 수 있다. 즉 back-end가 워드프레스로 쉽게 생성이되면, 사용자는 front-end만 구성해주면 되기 때문에.
또한 각각의 레코드는 searching을 각각 구성해버리면 된다.
환자 ID 생성
CPT와 WPF 세팅
일단 이번 포스팅에서는 DB내 환자 ID 생성하는 방법은 다음과 같이 한다.
- CPT UI에서 ‘Patients’라는 Post Type을 생성 (Has Archive를 True로 세팅해둔다 – 나열이 가능하게 하기 위함)
- 그리고 이 Post Type을 작성하기 위한 Form을 WPF에서 생성해주는데, 과감히 Post Title과 Post Body를 제외하고 일단 ID 창을 만드는데, Hooking을 이용한다.
- hook_patient_id_making라는 Hook name을 세팅했다.
- 관련 함수를 해당테마의 function.php을 수정한다.
function making_id( $form_id, $post_id, $form_settings ) {
if ( $post_id ) { //포스팅 수정일 경우
$em = get_post_meta($post_id, 'pts_id');
$pts_id = $em[0];
}
else //신규 포스팅의 경우
{
$blogtime = current_time( 'mysql' );
list( $today_year, $today_month, $today_day, $hour, $minute, $second ) = split( '([^0-9])', $blogtime );
$args = array(
'year' => $today_year,
'monthnum' => $today_month,
'day' => $today_day,
'post_type' => 'patients'
);
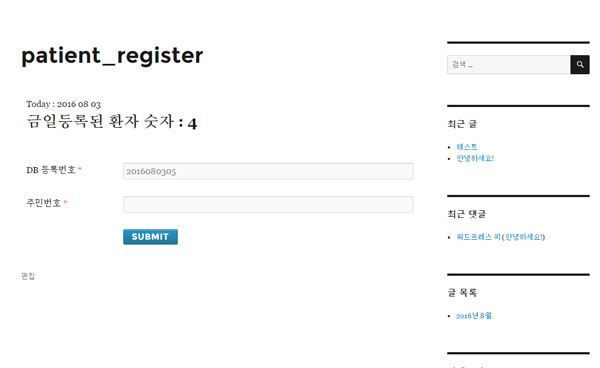
echo "Today : ".$today_year." ".$today_month." ".$today_day;
$the_query = new WP_Query( $args );
echo "<h2>금일등록된 환자 숫자 : ".$the_query->found_posts."</h2>";
$pts_id = sprintf("%04d%02d%02d%02d",$today_year,$today_month,$today_day,$the_query->found_posts+1);
}
?>
<li class="wpuf-el pts_id" data-label="DB 등록번호"> <div class="wpuf-label">
<label for="wpuf-pts_id">DB 등록번호 <span class="required">*</span></label>
</div>
<div class="wpuf-fields">
<input class="textfield wpuf_pts_id_28" id="pts_id" readonly="readonly" type="text" data-required="yes" data-type="text" name="pts_id" placeholder="" value="<?=$pts_id ?>" size="40" />
<span class="wpuf-help"></span>
</div>
<script type="text/javascript">
wpuf_conditional_items.push();
</script>
</li>
<?php
}
add_action( 'hook_patient_id_making', 'making_id',10,3);
/**** 이하는 DB저장을 위한 함수 ****/
function wpufe_update_pid( $post_id ) {
if ( isset( $_POST['pts_id'] ) ) {
update_post_meta( $post_id, 'pts_id', $_POST['pts_id']);
}
}
add_action( 'wpuf_edit_post_after_update', 'wpufe_update_pid' );
add_action( 'wpuf_add_post_after_insert', 'wpufe_update_pid' );
(1) blogtime = current_time( ‘mysql’ );
list( $today_year, $today_month, $today_day, $hour, $minute, $second ) = split( ‘([^0-9])’, $blogtime );
금일 날짜를 받아서
(2) $args = array(
‘year’ => $today_year,
‘monthnum’ => $today_month,
‘day’ => $today_day,
‘post_type’ => ‘patients’
);
쿼리를 만든다. 즉 금일 등록된 ‘patients(custom type)’의 개수를 세기 위함
(3) echo “Today : “.$today_year.” “.$today_month.” “.$today_day;
$the_query = new WP_Query( $args );
$the_query->found_posts
found_post가 찾아진 갯수
(4) ID를 $pts_id = sprintf(“%04d%02d%02d%02d”,$today_year,$today_month,$today_day,$the_query->found_posts+1);
즉 2016080301 이런식으로 만드는 것이다. 그럼 중복되지 않으니까.
이하는 폼 html 태그와 DB저장을 위한 후킹 부분이다.
Patient Archive 확인
테스트를 위해 환자를 막 등록해본다.(CPT UI에서 has_archive = true로 하는 것을 잊지 말것)
- 일단 이렇게 등록을 하고 나면, 이제 archive를 확인할 것이다.
- CPT가 제대로 됐다면 아래처럼 눌렀을 때 리스트가 나온다.
http://127.0.0.1/wp/archives/patients
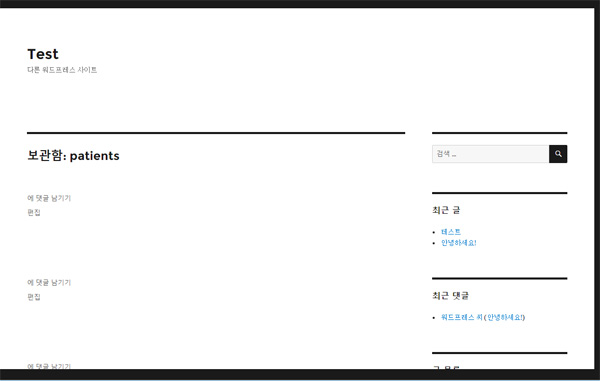
(위의 예시와는 다를 수 있다. 당연한 얘기지만 나는 patient 등록 form에 post_title과 post_body가 없으니 아무내용 없는 빈페이지 뿐인 것이다)
Cutsom Archive 페이지 만들기
얘기했듯이 기존의 page와 구분되는 patients만 보는 페이지를 만들어보겠다.
- 이를 위해 테마폴더의 archive.php를 archive-patients.php로 복사를 한다. 그리고 소스의 이 부분을 바꾼다.
get_template_part( ‘template-parts/content’, get_post_format() );
get_template_part( ‘template-parts/content’, $post->post_type);
get_post_format() 이 null값이 나오더라. 우리는 patients에 해당하는 부분만 만들것이니까 $post->post_type으로 바꾸면 ‘patients‘ 라는 문자열로 잘 넘어간다.
그리고 테마폴더의 template_parts의 content-single을 content-patients.php로 복사해서 원하는 방법으로 고치는데, 이렇게 해보았다. (즉 custom type 의 이름이 계속 쓰이는 구조이다)
일단 archive-patients.php에서는 <table></table>로 루프를 감싸고,
<table>
			<?php
			// Start the Loop.
			while ( have_posts() ) : the_post();
				/*
				 * Include the Post-Format-specific template for the content.
				 * If you want to override this in a child theme, then include a file
				 * called content-___.php (where ___ is the Post Format name) and that will be used instead.
				 */
				get_template_part( 'template-parts/content', $post->post_type/*get_post_format()*/ );

			// End the loop.
			endwhile;
			?></table><?php
content-patients.php를 다음처럼 만든다. (이정도면 사실 archive에서 합쳐도 될것 같다.)
<article id="post-<?php the_ID(); ?>" <?php post_class(); ?>>

	<?php
			echo $post->ID;
			$pts_id = get_post_meta($post->ID, 'pts_id')[0];
	?>
	<tr><td><?=$pts_id?></td><td>빈칸입니다.</td></tr>
</article><!-- #post-## -->
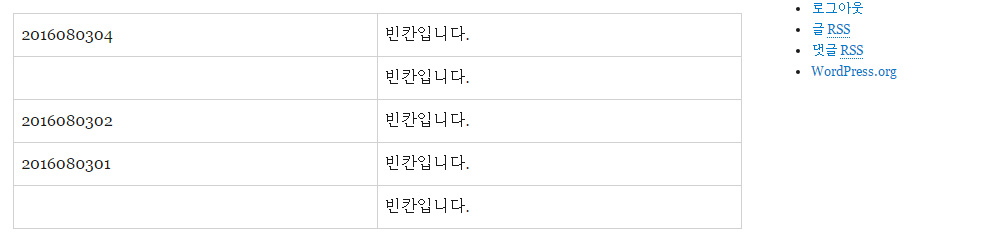
이렇게 나온다. 저 빈칸들을 이용해 나중에 하위 레코드를 보거나, 추가적인 기능을 사용해볼 수 있겠다.
** 중요한 것은 저렇게 table로 해버리면 안된다. 예시를 위해 대강 table로 한 것이고, <article> 같은 태그가 있으니 div로 잘 쌓아서 table처럼 만들어야 할 것 같다. 아니면 article 태그를 없애버리든지?? **
다음 포스팅에서는
다음엔 codex를 이용한 검색을 만들 계획인데, 예를들면 위의 데이터를 이용해서
/patients/2016080304/ 라고 치면 바로 2016080304에 해당하는 기록들만 다시 쭉 나오게하는 방식이다.
또한 주민등록번호를 암호화시켜 저장하는 방법을 한번 알아봐야겠다.
References
- http://www.billerickson.net/code/wp_query-arguments/
- https://codex.wordpress.org/Post_Types